Installing npm packages into a Unity project
Installing npm packages that are enabled to work with the unity3d-package-syncer tool is a fairly straightforward process!
First of all your project will need to be initialized with a “package.json” file so that npm can install, update and uninstall packages. With this in place you can install the unity3d-package-syncer tool which will help you to synchronize packages into your Unity project’s “Assets” folder:
npm install --save unity3d-package-syncer
You will then need to ensure that you have an npm script inside your “package.json” file that will trigger package synchronization:
{
  "name": "my-unity-project",
  "version": "1.0.0",
  "description": "",
  "scripts": {
    "sync": "unity3d--sync"
  },
  "dependencies": {
    "unity3d-package-syncer": "^1.0.1"
  }
}
Finally you can install any npm packages that you want; both those that will synchronize with your Unity project and those that are required for any node based automation. Your project’s “sync” script (as defined in your “package.json” file) can then be invoked:
npm install --save unity3d-package-example
npm run sync
The output of this command should look something like this:
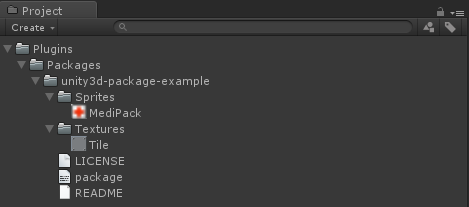
If we look inside the project’s “Assets” folder we should then see something like this:
If you wanted to save a few keystrokes then you can install multiple packages into your Unity project and synchronize any unity3d-package-syncer-enabled packages with a single command line. For instance, the following command would install and synchronize 3 packages ‘foo’, ‘bar’ and ‘baz’.
npm install -s foo bar baz && npm run sync
And of course, you can install any regular node packages that you want to. For instance, if you needed to do some sort of template processing then you might choose to install the marvelous nunjucks package.